youtube.com/shorts/v9cCaHwzpaU
Funny Lion SugarPaste CakeTopper
youtube.com/shorts/v9cCaHwzpaU
Funny Lion SugarPaste CakeTopper

This method is so simple. It takes time if you have big surface but it’s so fun…
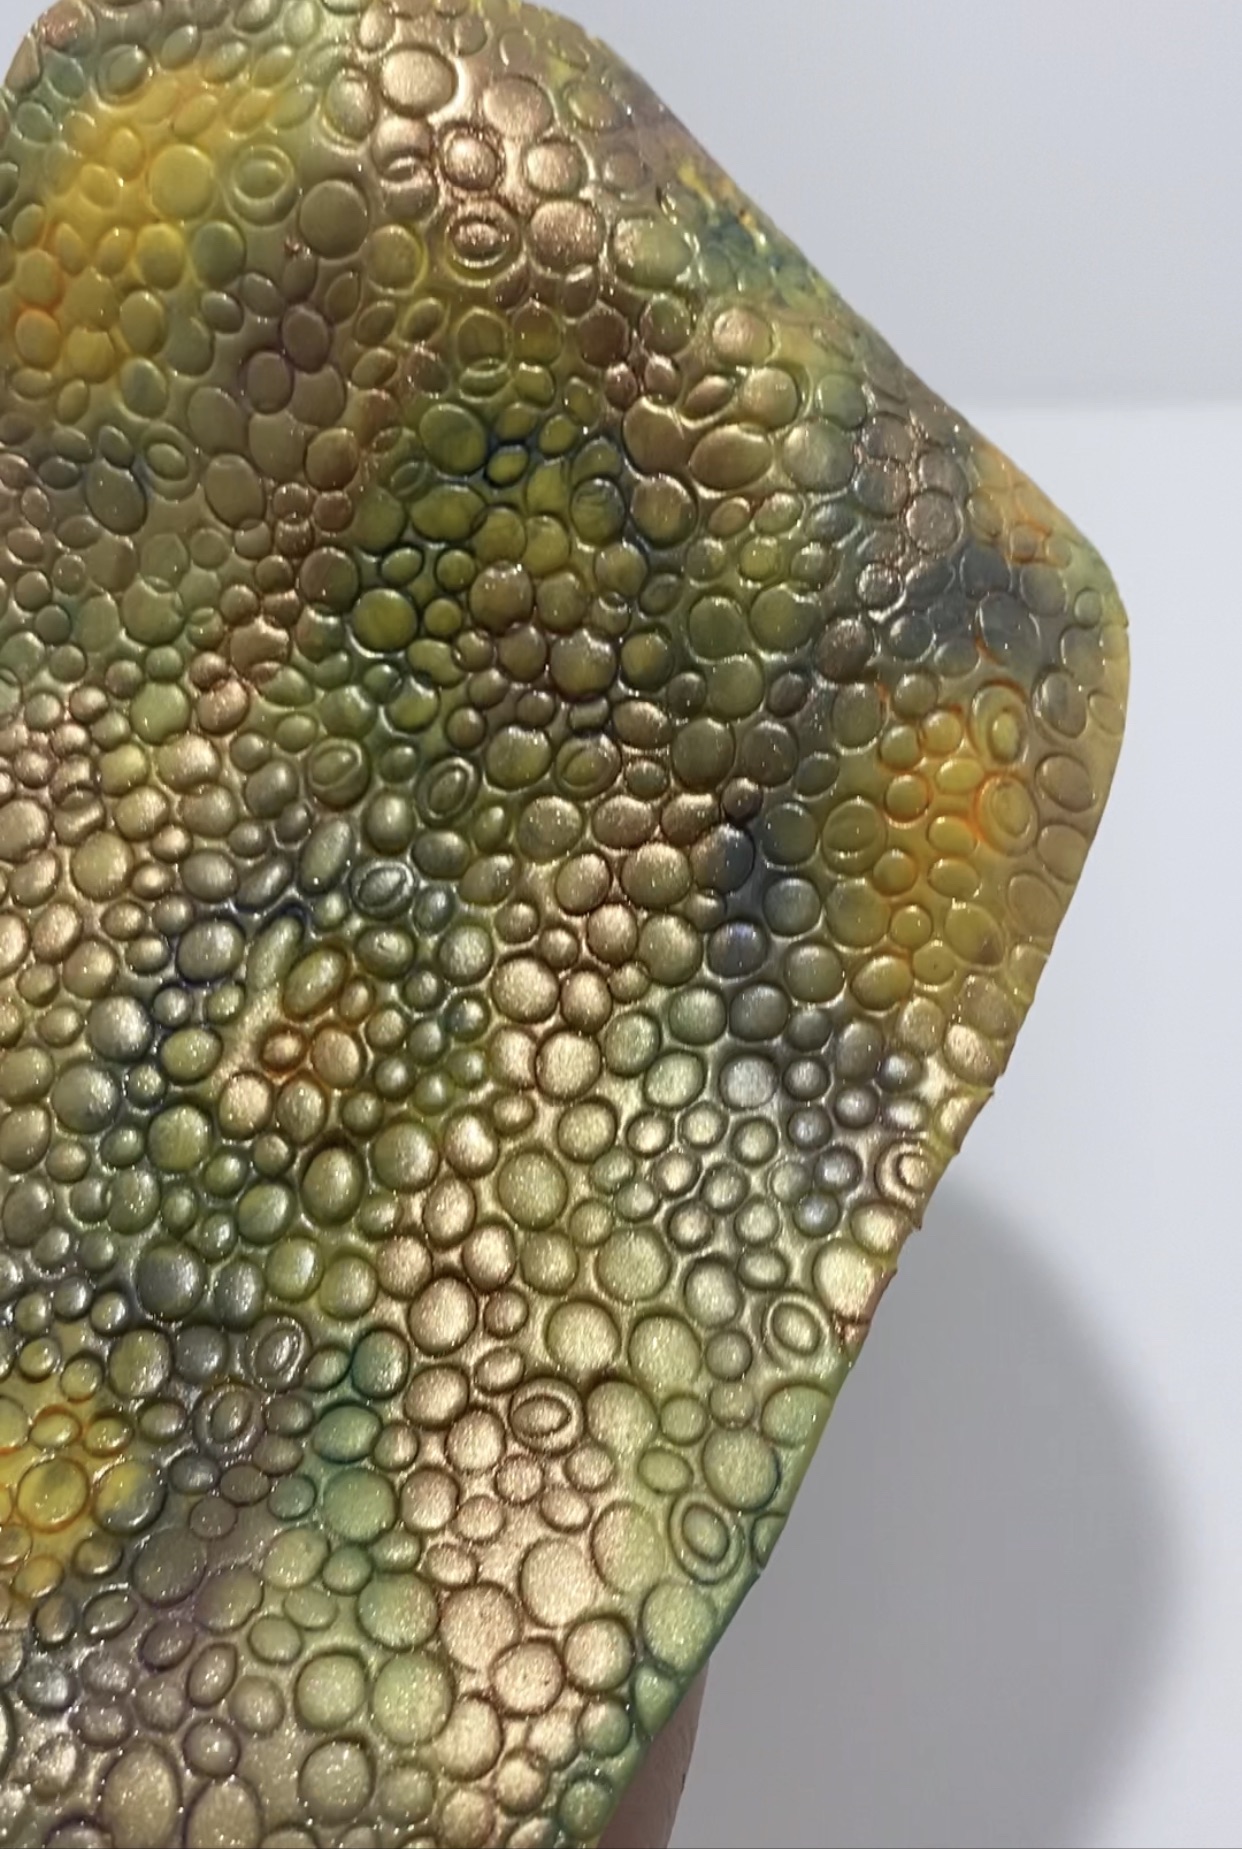
You can use it making dragon dinosaur lizard iguana gecko turtle snake any reptiles or leather effect texture like handbag. On a mermaid tail could be so nice too.
You need:
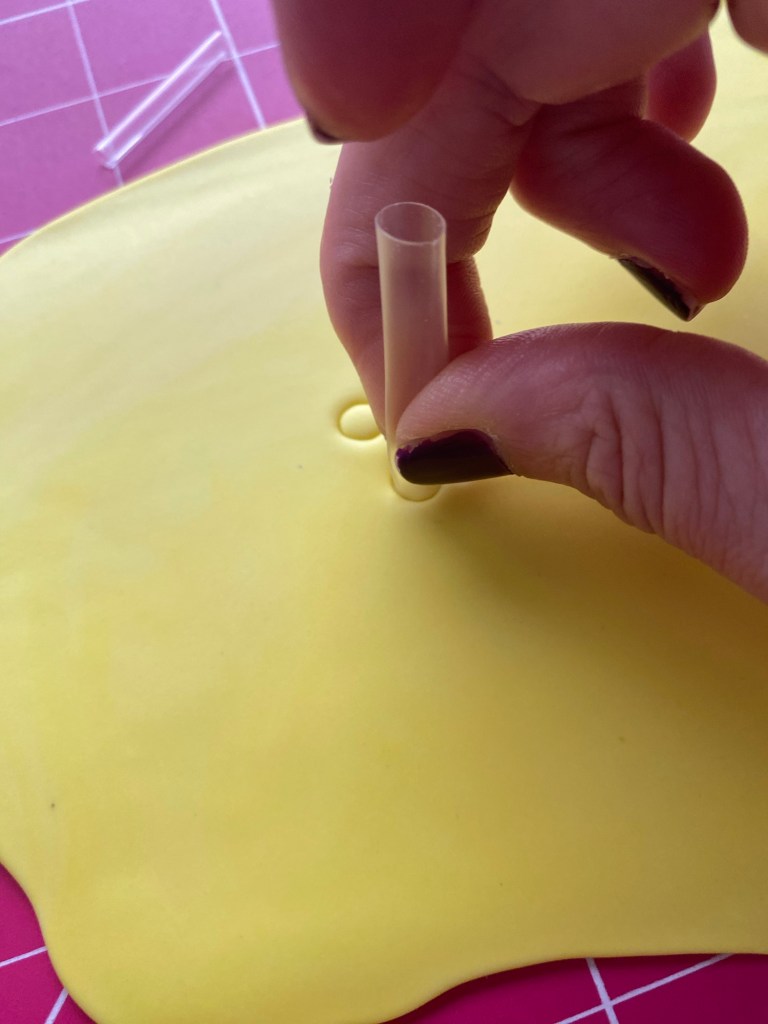
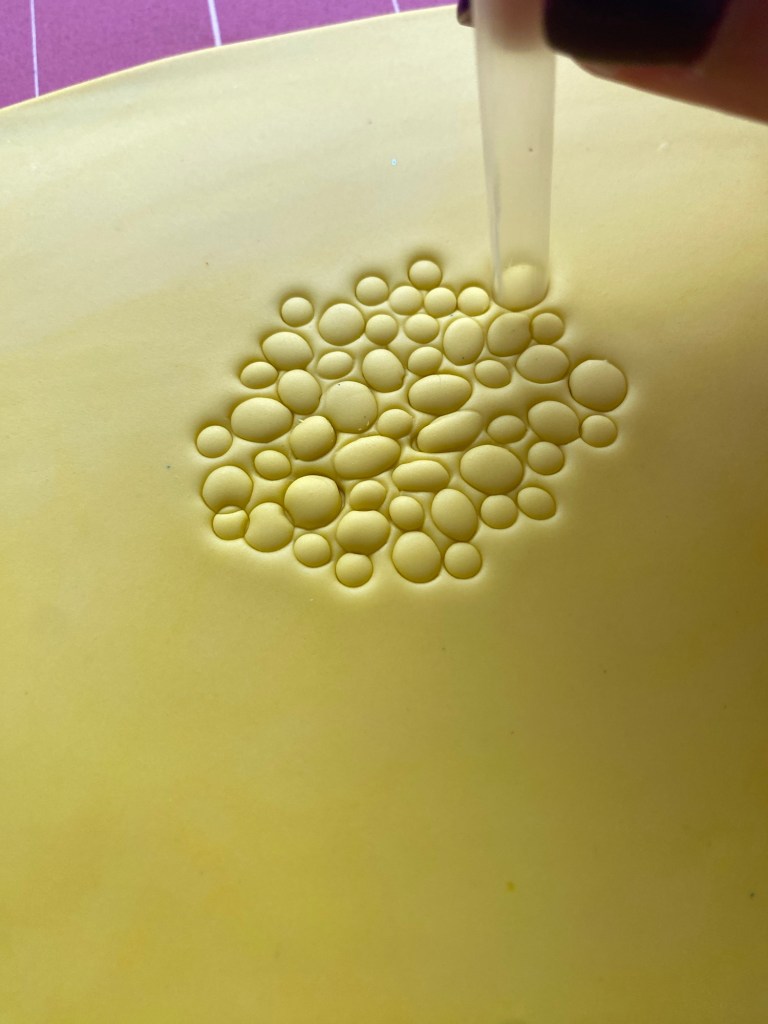
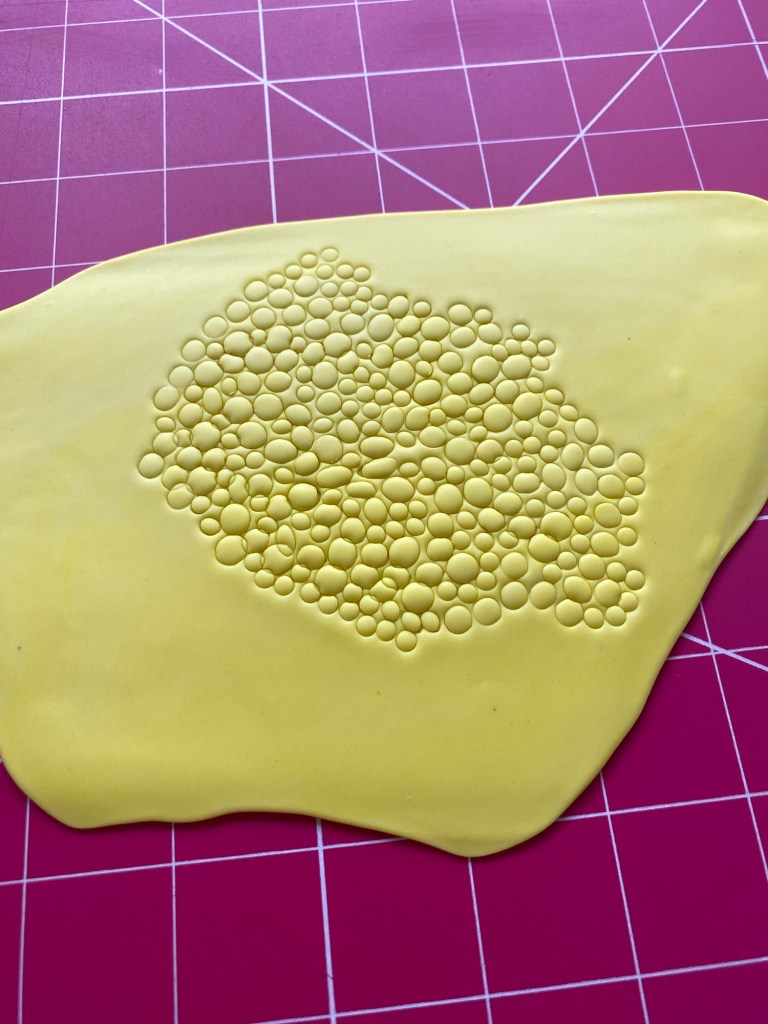

2. Your sugar paste is ready to be colored.
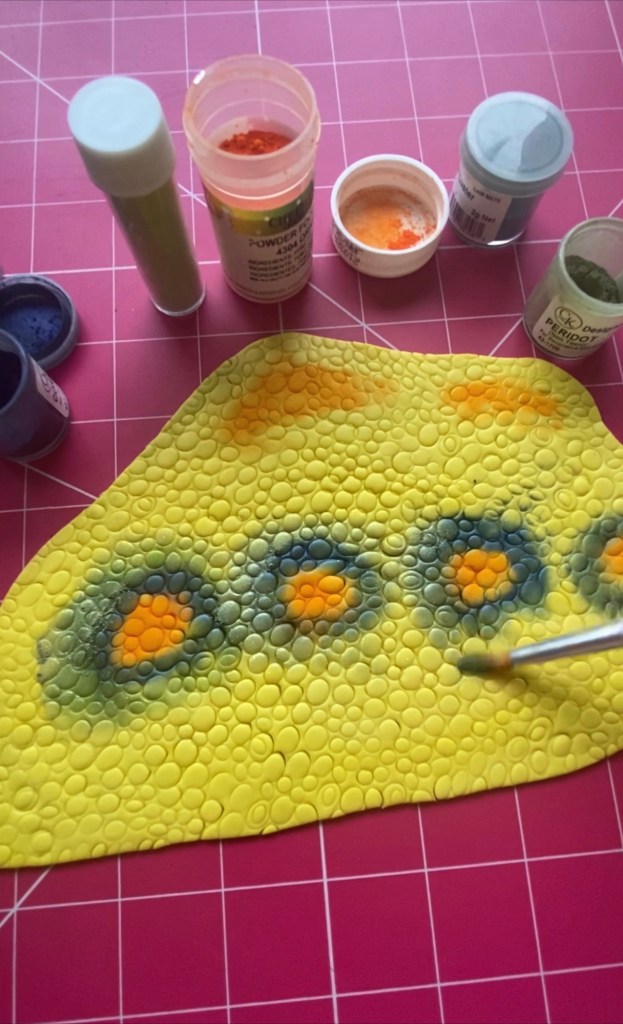
I used
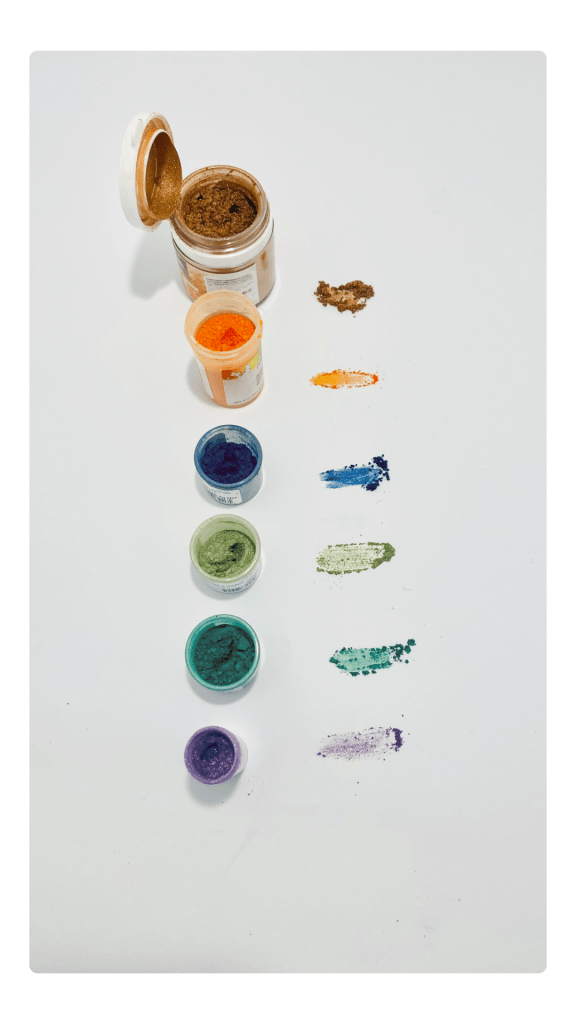
I started with orange and added the other colors around it. In the end, I covered the entire surface with shiny light green powder.


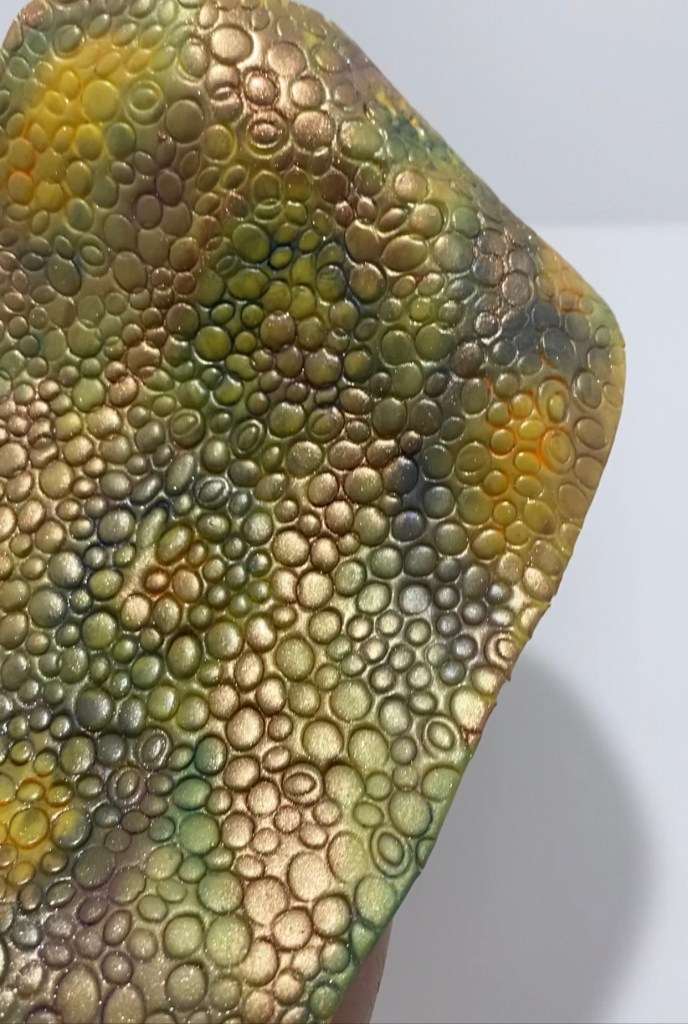
That’s it-so simple. You can also cut out round pieces to cover the top of cupcakes.
Enjoy your creation 😊
Without oil and butter

Since I’ve been baking this recipe is my all-time favorite for a rich chocolate flavor. It’s very easy and quick to bake, resulting in a soft and moist texture that’s sturdy enough to support any layered cake, making it perfect for use under fondant. You can also use this recipe to make cupcakes, cake pops or cake sicles.
I didn’t use oil as this recipe usually recommends, because it works well without. The heavy cream give enough moisture. However, if you prefer, you can add it, as mentioned in the ingredients below.
Here’s what you need:
INGREDIENTS
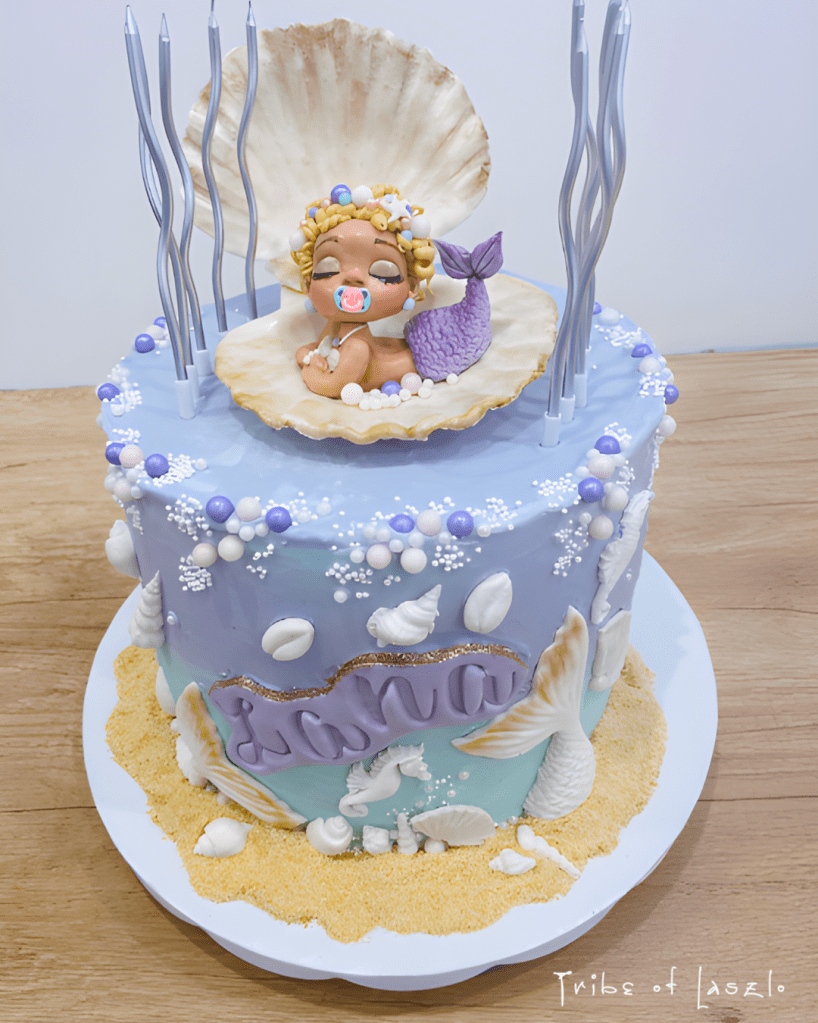
This quantity is enough to make an 8 inch cake with 2 layers like ( 2 x 1,5 inch thick).
“I made this cake with double of the quantities, resulting in four layers that are each about 1 and 1/3 inches thick (approximately 3 cm each).”
PREPARATION
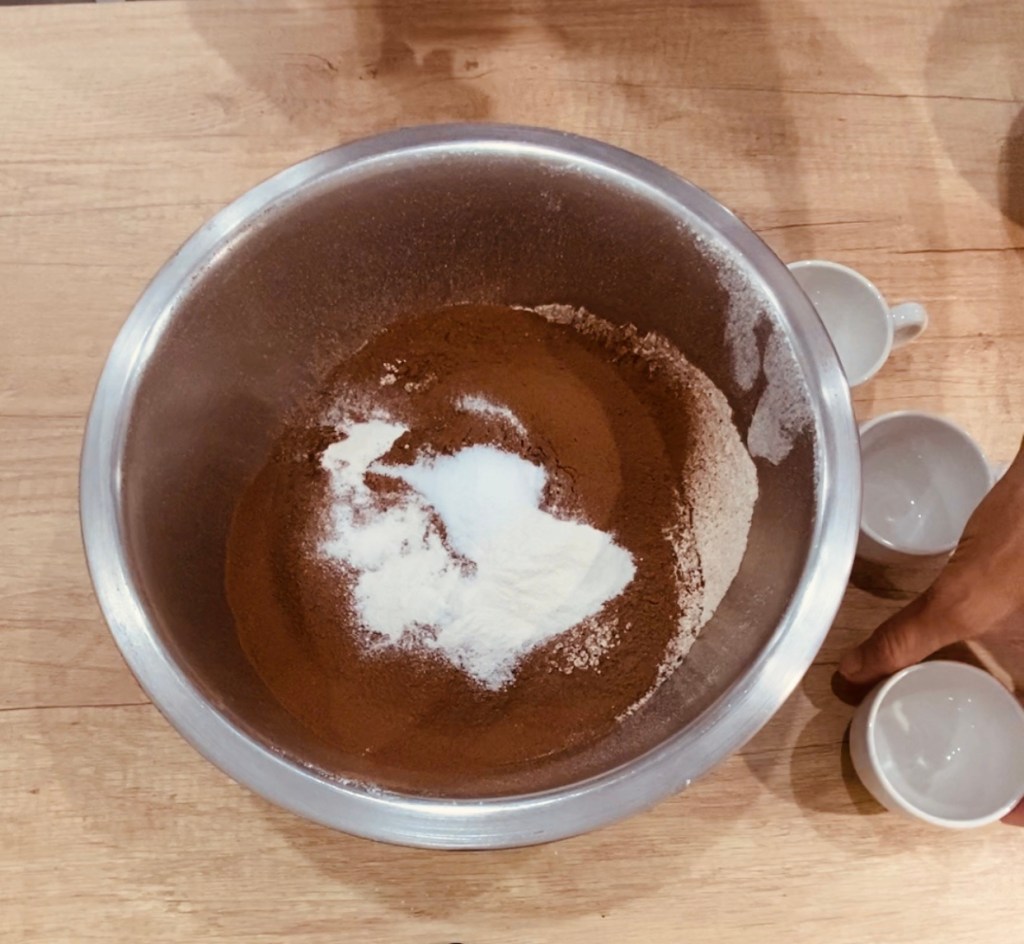
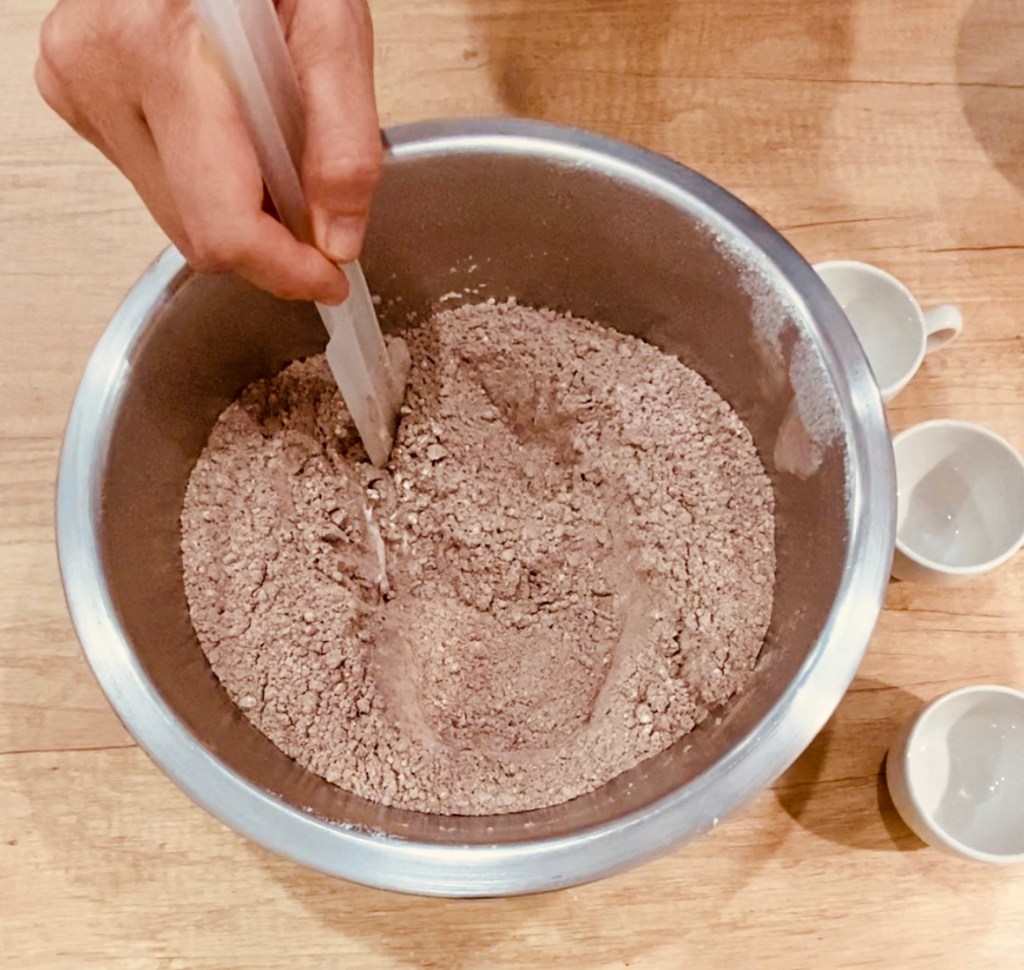
1. Sift both the flour and cocoa powder, then add all the dry ingredients. Mix well.

2. Mix all the liquid ingredients together until there are no lumps. This can take some time or you can use a mixer.
3. Mix the dry and liquid ingredients together until the mixture is creamy.
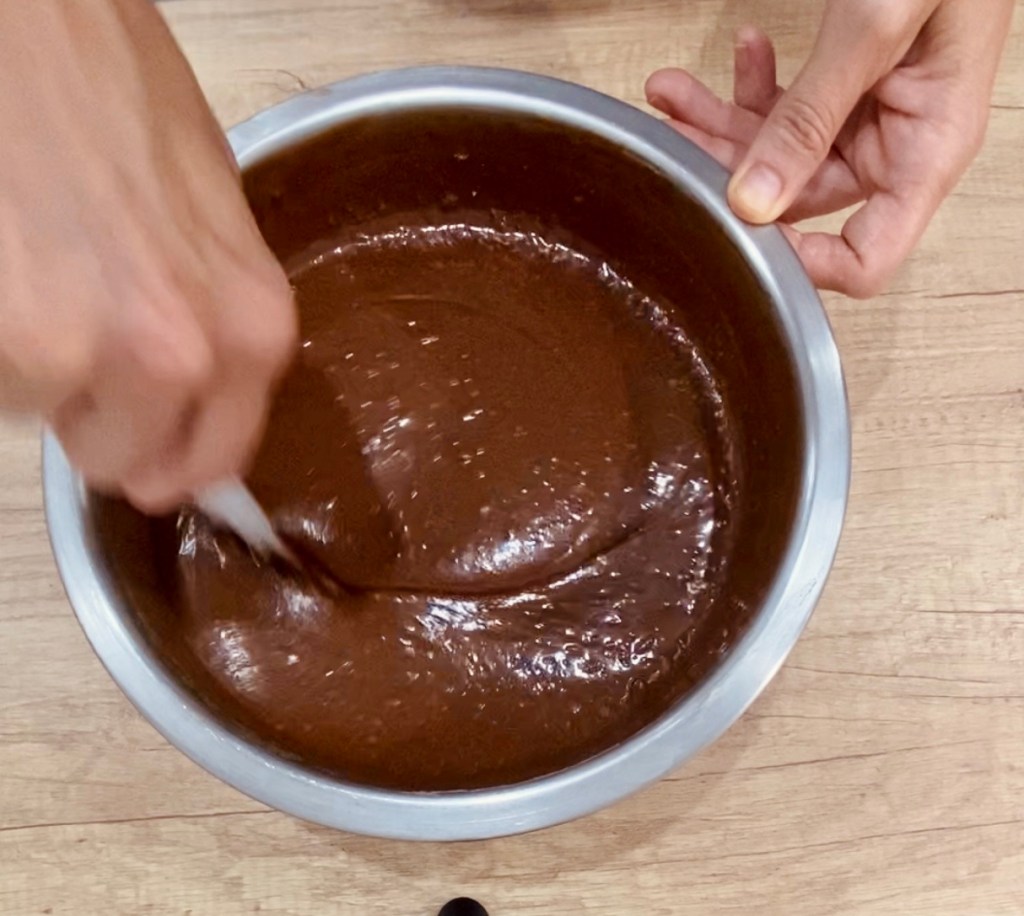
4. Finally, add the hot coffee to the batter.
5. Preheat the oven at 180 degrees for 10 minutes before using it. Meanwhile, distribute the butter evenly among the pans and cover them with parchment paper.
You are ready to bake.
Place it in the oven for 30-33 minutes at 180 degrees (356 Fahrenheit). Keep in mind that baking times may vary depending on your oven.
If you bake the layers separately, the baking time will be less, depending on their thickness.
You can use a wooden skewer to check if the cake is cooked in the middle. When you pull it out, it should come out dry.
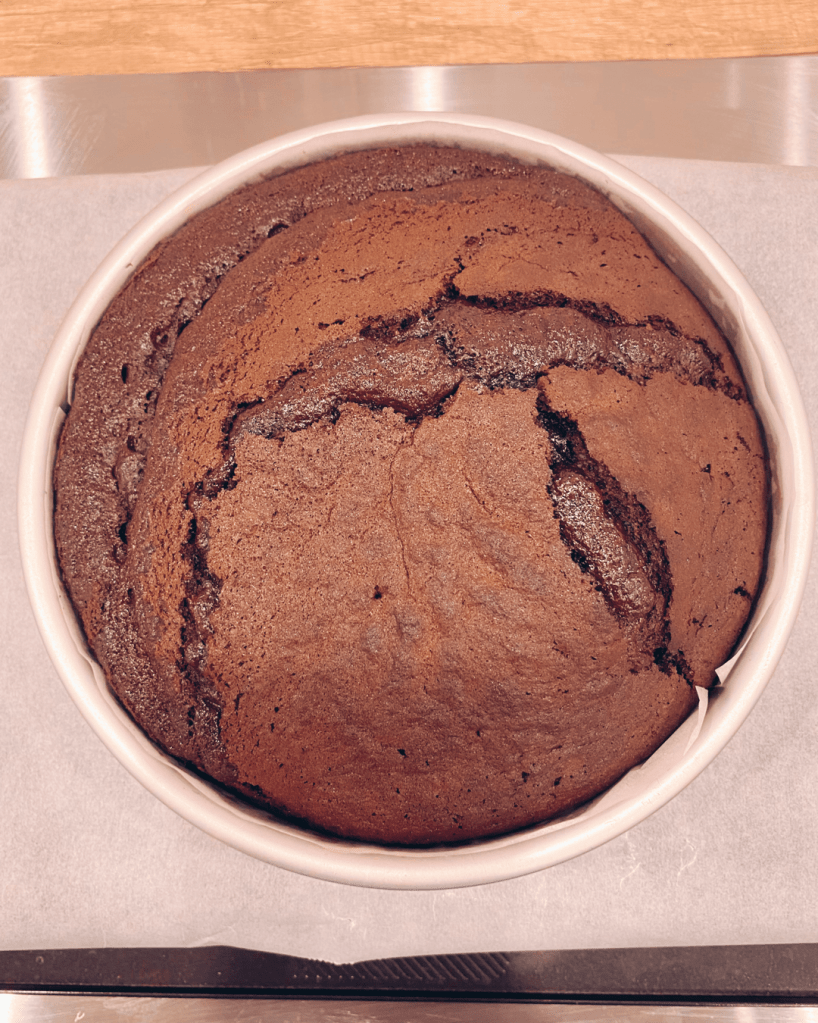
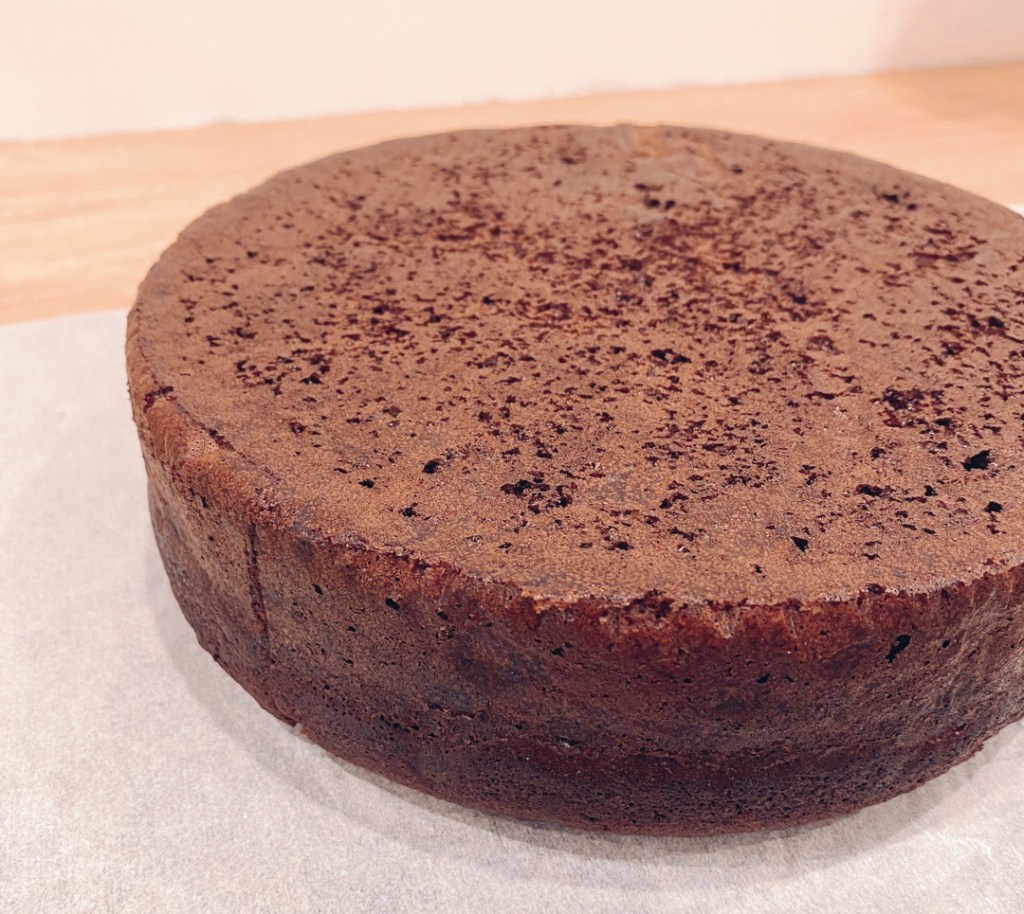
Wait until it cools down, then flip it over to achieve a nice flat top. It tends to flatten out easily.
JOYFUL BAKING
I’ve used this batter many times and have never been disappointed.


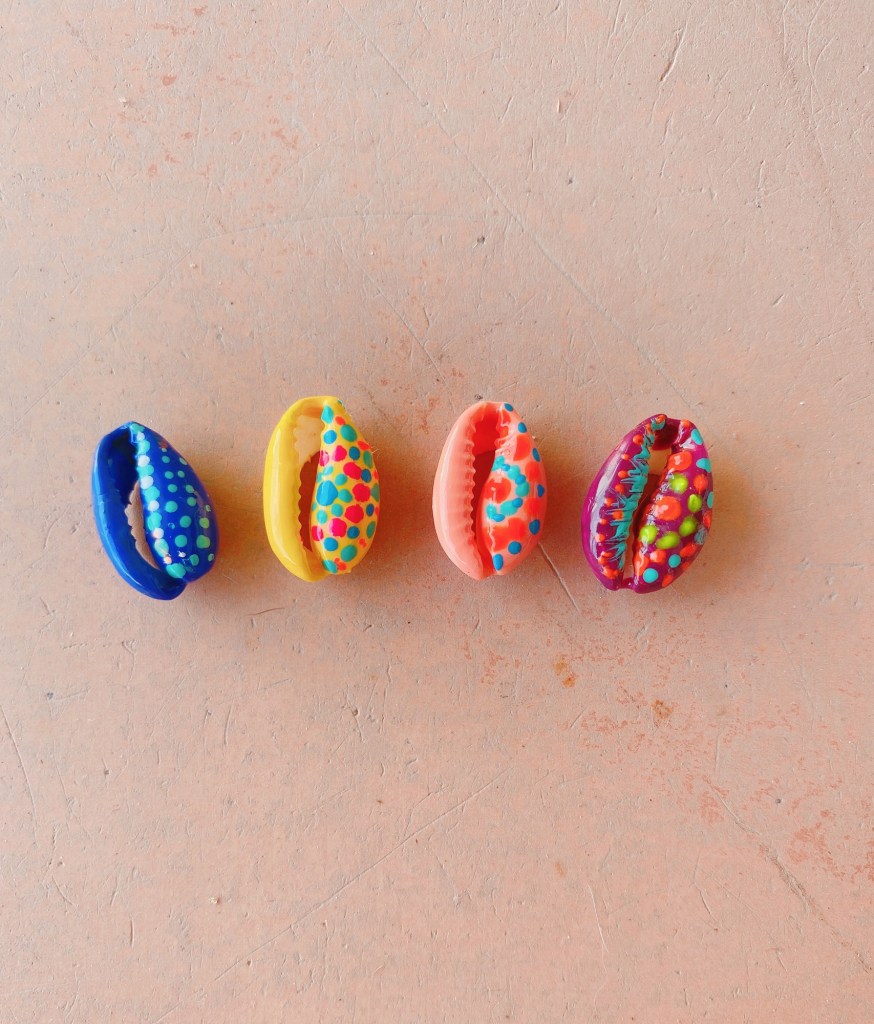
Cowrie shells, known as ‘money cowrie, were historically used as currency on Africa’s western coast from the 14th century. They hold spiritual significance, symbolizing abundance, wealth and fertility due to their form. Additionally, they are believed to offer protection from bad spirits and bring good luck.
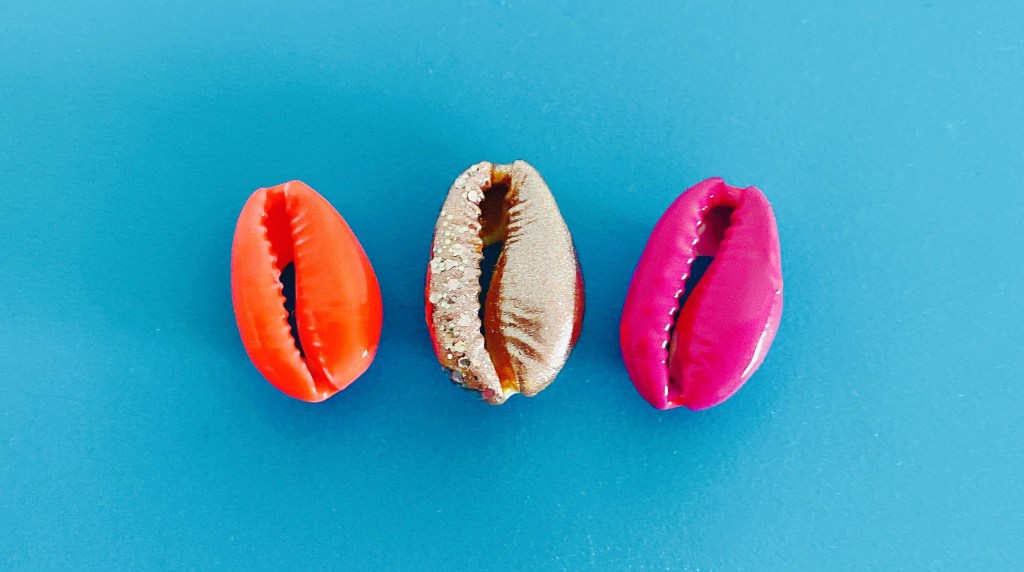
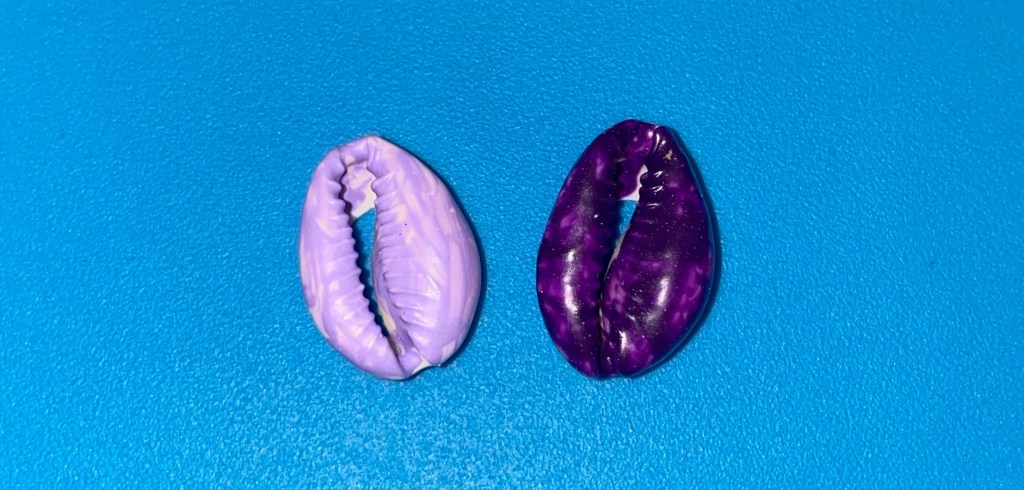
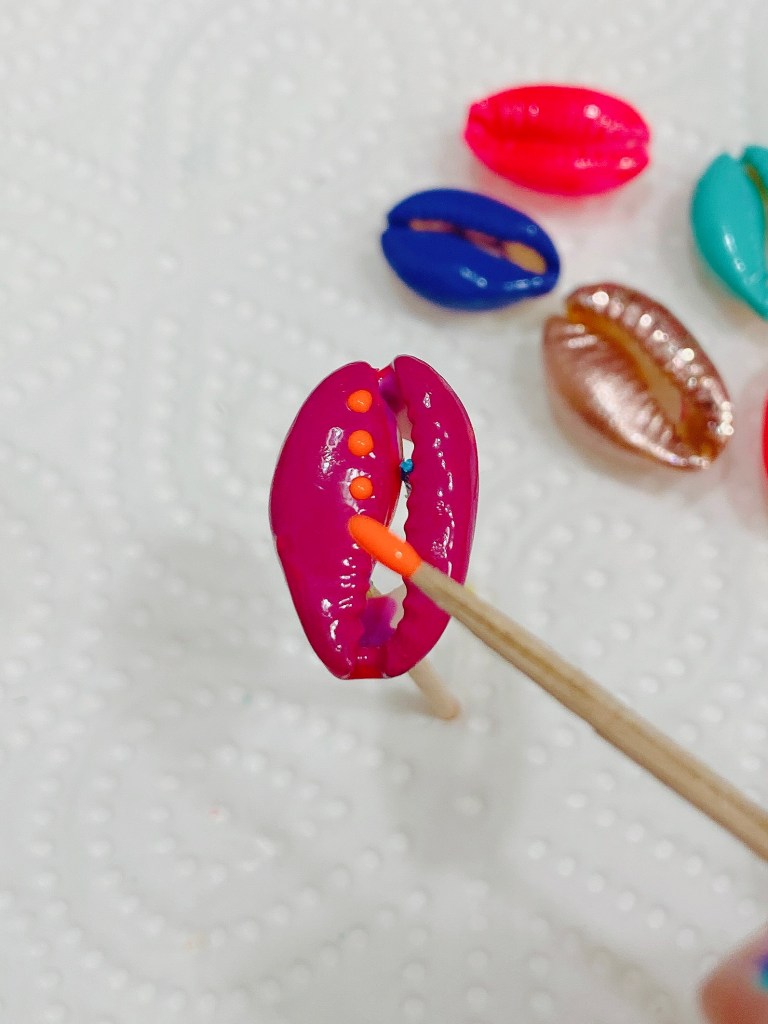
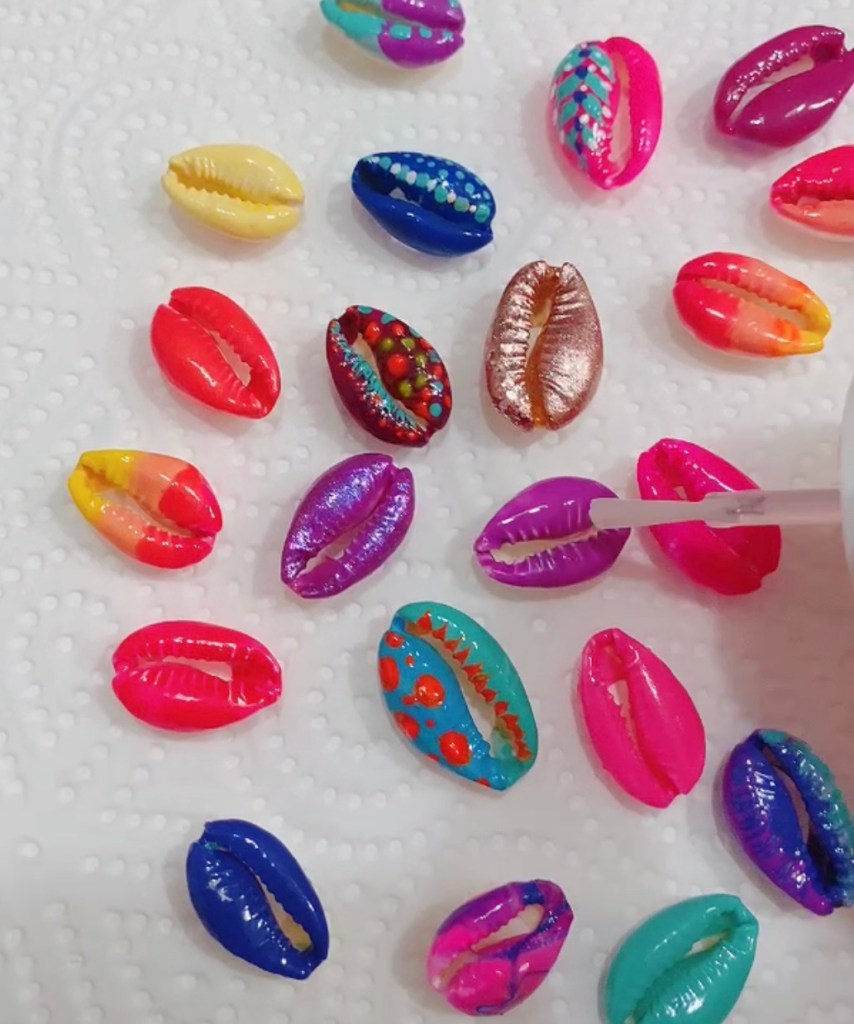
The natural beauty of cowrie shells is striking, and enhancing them with vibrant colors can add a playful and creative touch, making each piece different.

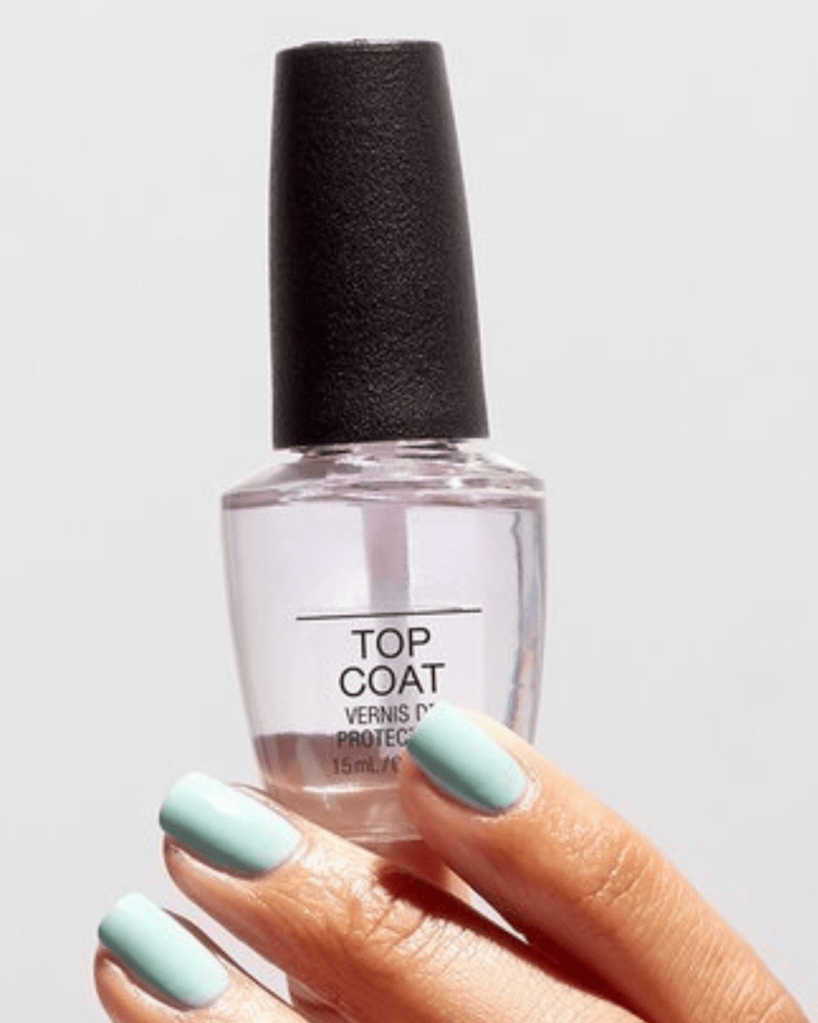
When deciding between acrylic paint and nail polish, both are viable options. However, for achieving an instantly nice, smooth, and shiny surface, I prefer using Nail Polish especially if you would like only coloring it.
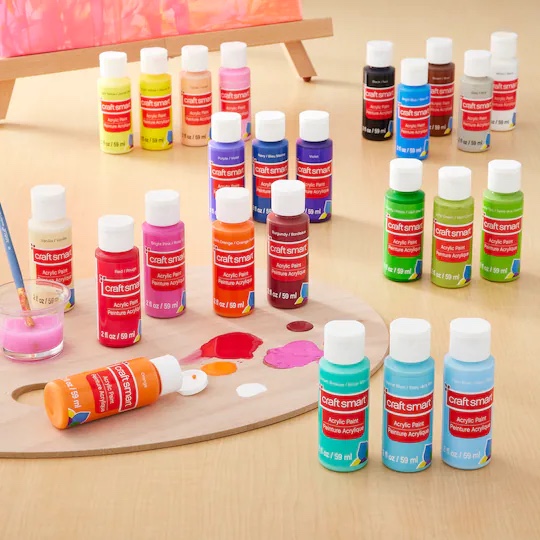

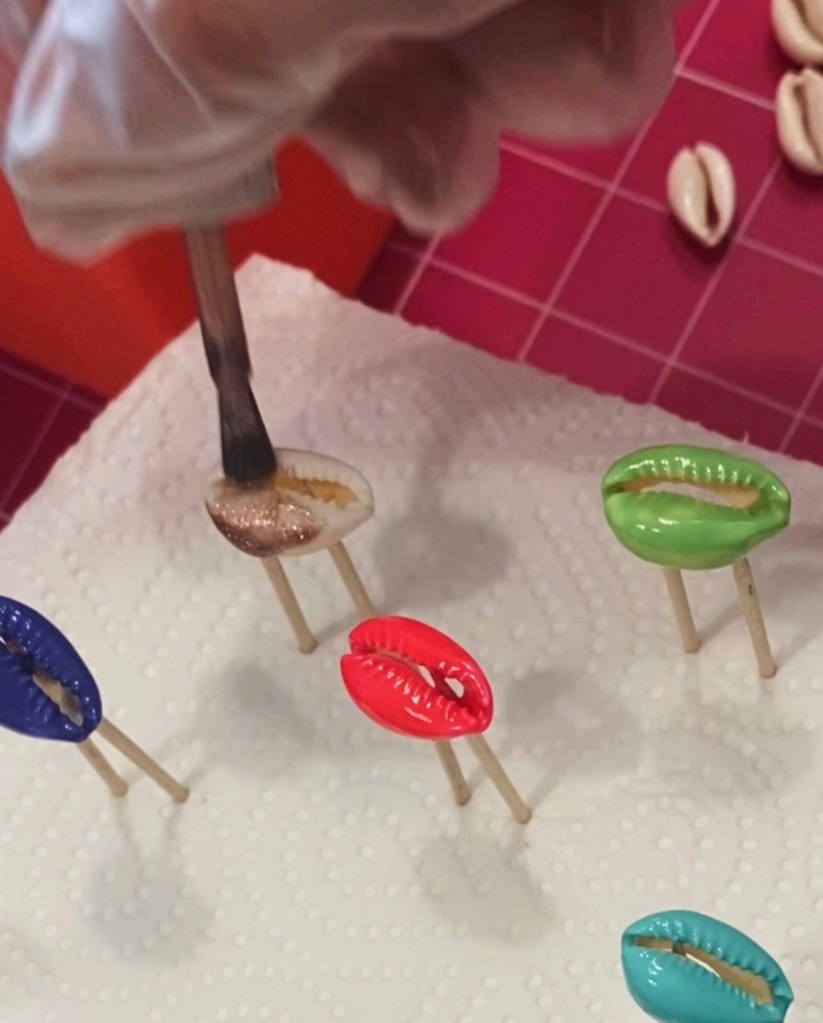
Acrylic Paint works well on the top for tiny details like dots and lines, so combining both for a fully decorated shell allows for the best outcome, in my opinion.
You can easily see the different:
Indeed, due to their small size, shells can be challenging to paint, but incorporating tiny motifs can transform them into miniature canvases and create unique pieces.
If you’d like to give it a try, here are some tips and tricks :
Now it’s your turn:) Have some fun!